
Eurotronic Comet Dect – the Smart Home Thermostat – Installation, Setup, Testing, and Conclusion – 30% Heating Cost Savings
In recent years, the topic of “Smart Home” has gained increasing importance. Today, the entire home can be automated and controlled through intelligent assistants. This is intended to simplify everyday life and, not least, save costs.
In addition to electricity, heating costs make up the largest portion of additional costs. This was one reason for us to upgrade an “old” heating system with the Comet Dect thermostats.
All the advantages of the Comet Dect at a glance:
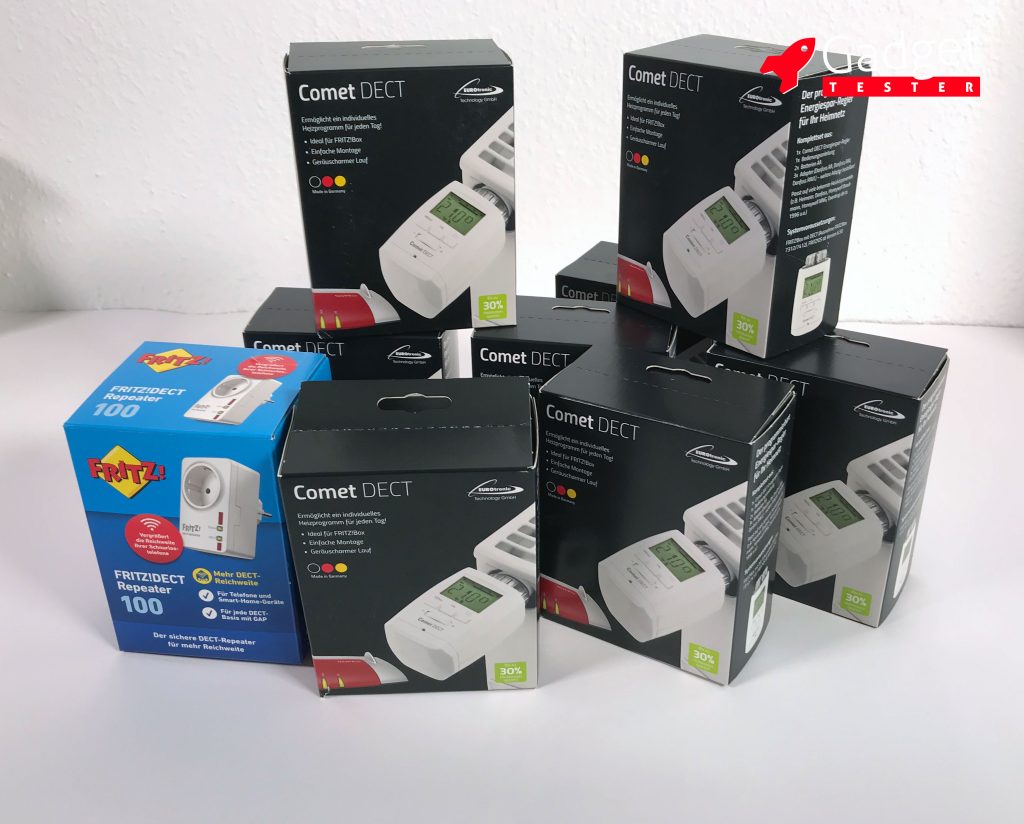
For our project, we ordered 8 Eurotronic Comet Dect and one Fritz!Dect Repeater 100. To make effective use of the Comet Dect devices, a Fritz!Box is also required. In our case, we are using the Fritz!Box 6490 Cable. A Fritz!Box with Dect is required (except for FRITZ!Box 7312/7412) and FRITZ!OS version 6.50 or higher.
Enhancing DECT Signal with the FRITZ!DECT Repeater 100
The Fritz!Dect Repeater 100 is designed to amplify the DECT signal from the Fritz!Box. To register the repeater with the Fritz!Box, plug it into a socket near the Fritz!Box and press the DECT button on the top of the Fritz!Box for about 10 seconds. Once the LED light on the repeater changes from blinking to a steady light, the repeater is registered. You can then plug it into a socket at the desired location. If you already have a DECT phone operating with the Fritz!Box, you are familiar with the range of the DECT signal. While the DECT signal has a greater range than the WLAN signal from the Fritz!Box, this range needs to be extended by the repeater beyond a certain distance.
Contents of the Euronic Comet Dect
Everything needed for retrofitting a radiator is included in the package.
The actual device is made of white plastic and is well-crafted. The screw ring is made of metal and gives a very solid impression.
The included instructions are written in a very clear manner and explain well how to register the thermostat with the Fritz!Box, mount it on the heater, and adjust it using the Fritz!Box control or the control buttons.
Two heating adapters allow the Comet Dect to operate with various heating systems. In our case, no adapter was necessary, so we could not verify the quality of these adapters.
Additionally, 2 AA batteries are included for operation. This should power the Comet Dect for about 1 year.
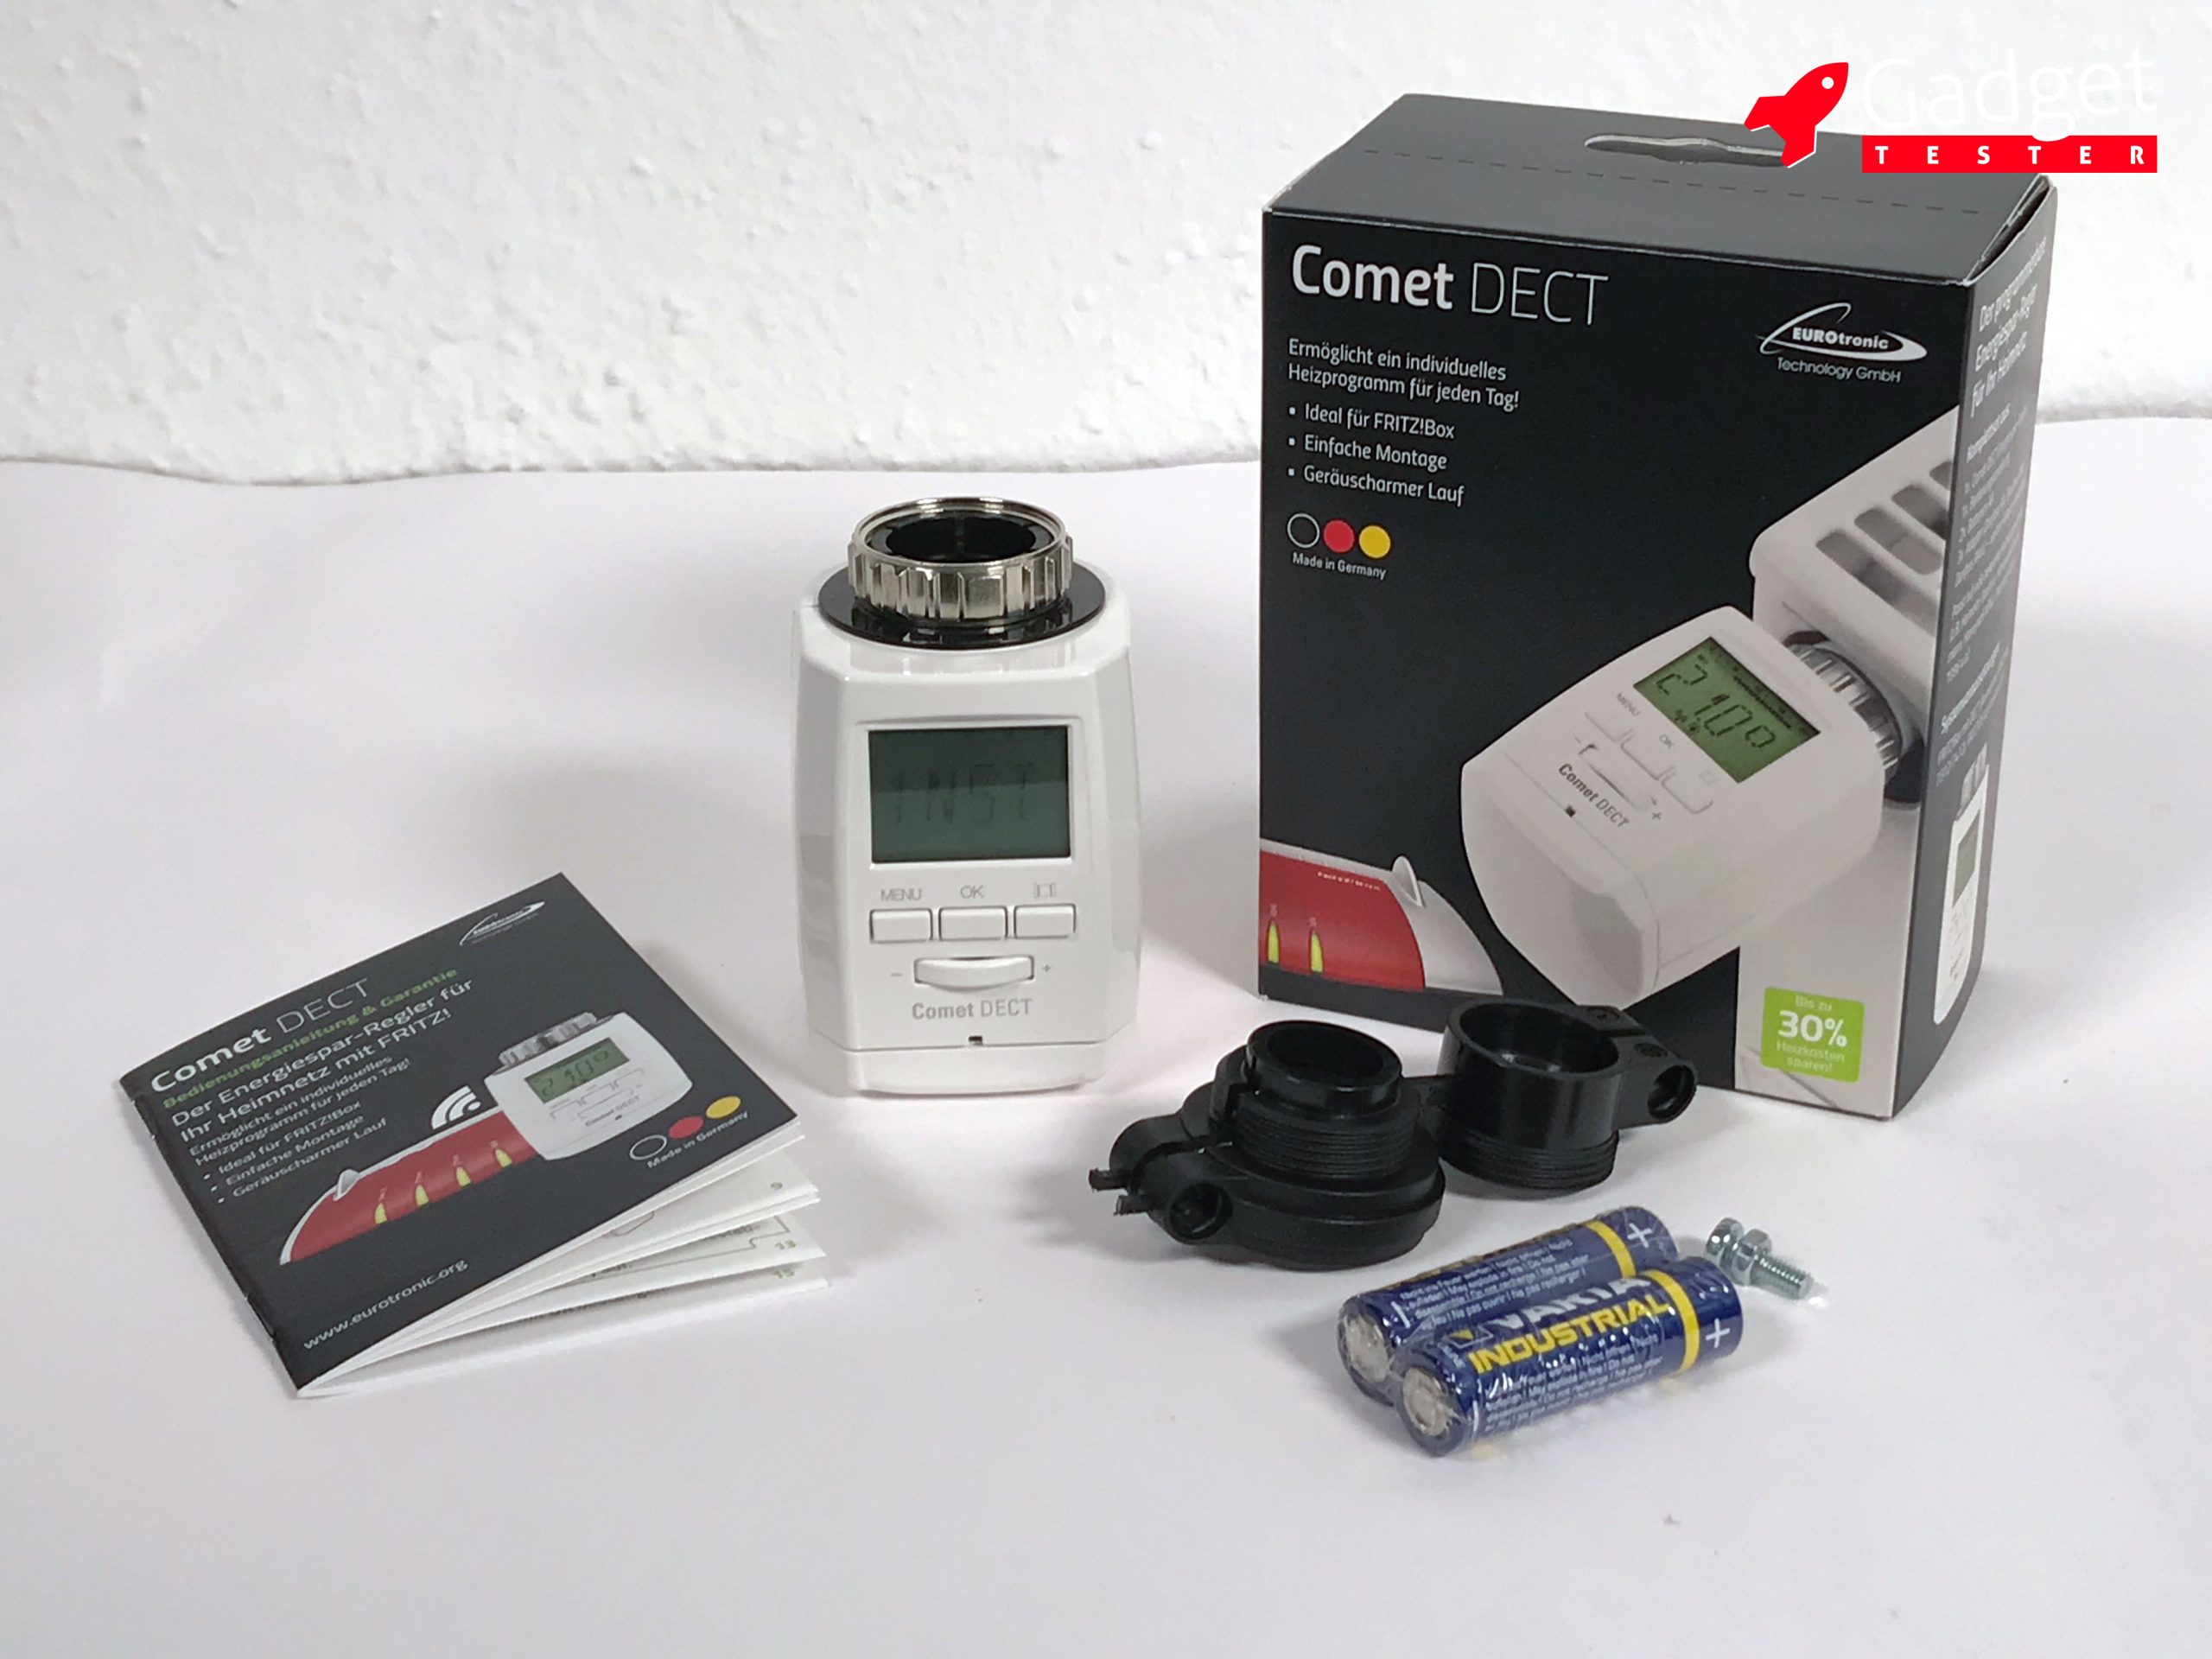
Contents of the Comet Dect: DECT thermostat, manual, heating adapter, and 2 batteries
Getting the Euronic Comet Dect Started
1. Register the Comet Dect with the Fritz!Box
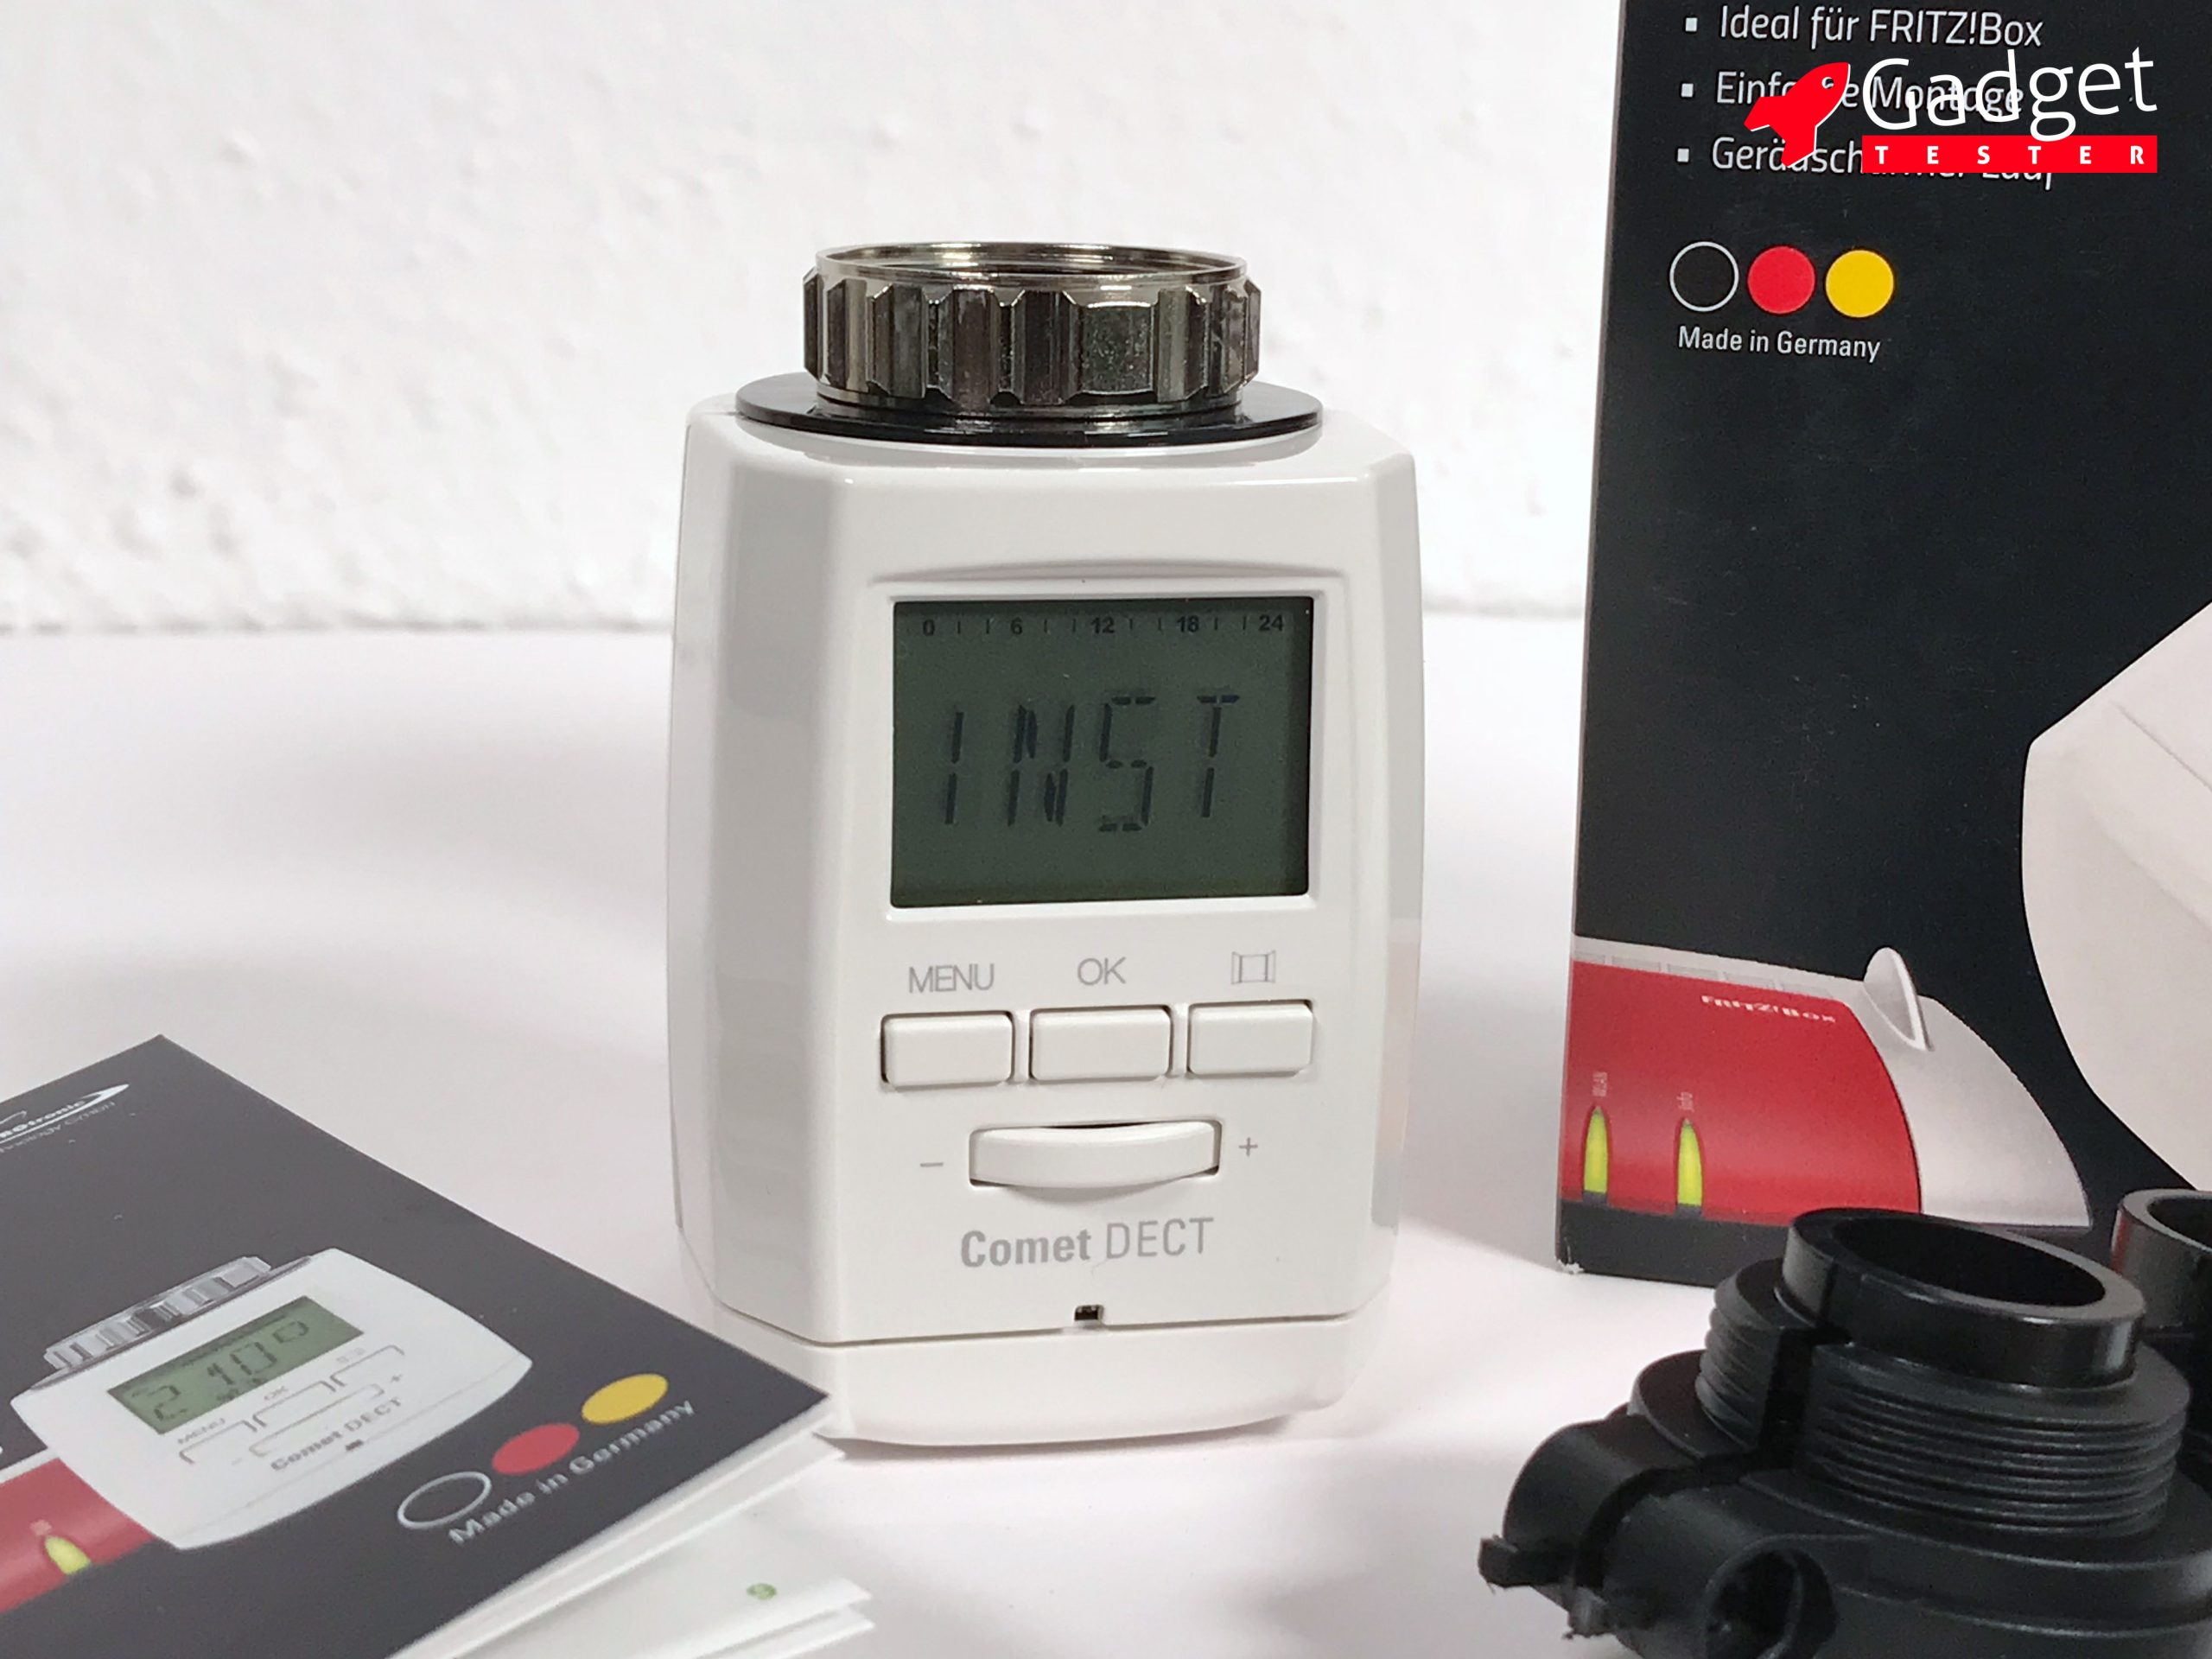
First, you need to insert the two batteries into the battery compartment. Then, the display shows “INST” for installation, and the DECT symbol blinks at the bottom of the screen. If the DECT symbol is not displayed, this issue can be resolved by removing the batteries and reinserting them.

The mounted Comet Dect with a constantly lit DECT symbol
Register the Comet Dect using the DECT button on the Fritz!Box
The easiest way to register the Comet Dect with the Fritz!Box is to press and hold the DECT button on the Fritz!Box for 10 seconds after inserting the batteries into the Comet Dect. The DECT symbol will then change from blinking to a constant light, and the thermostat will be registered with the Fritz!Box. All further settings can then be made through the Fritz!Box interface (https://fritz.box).
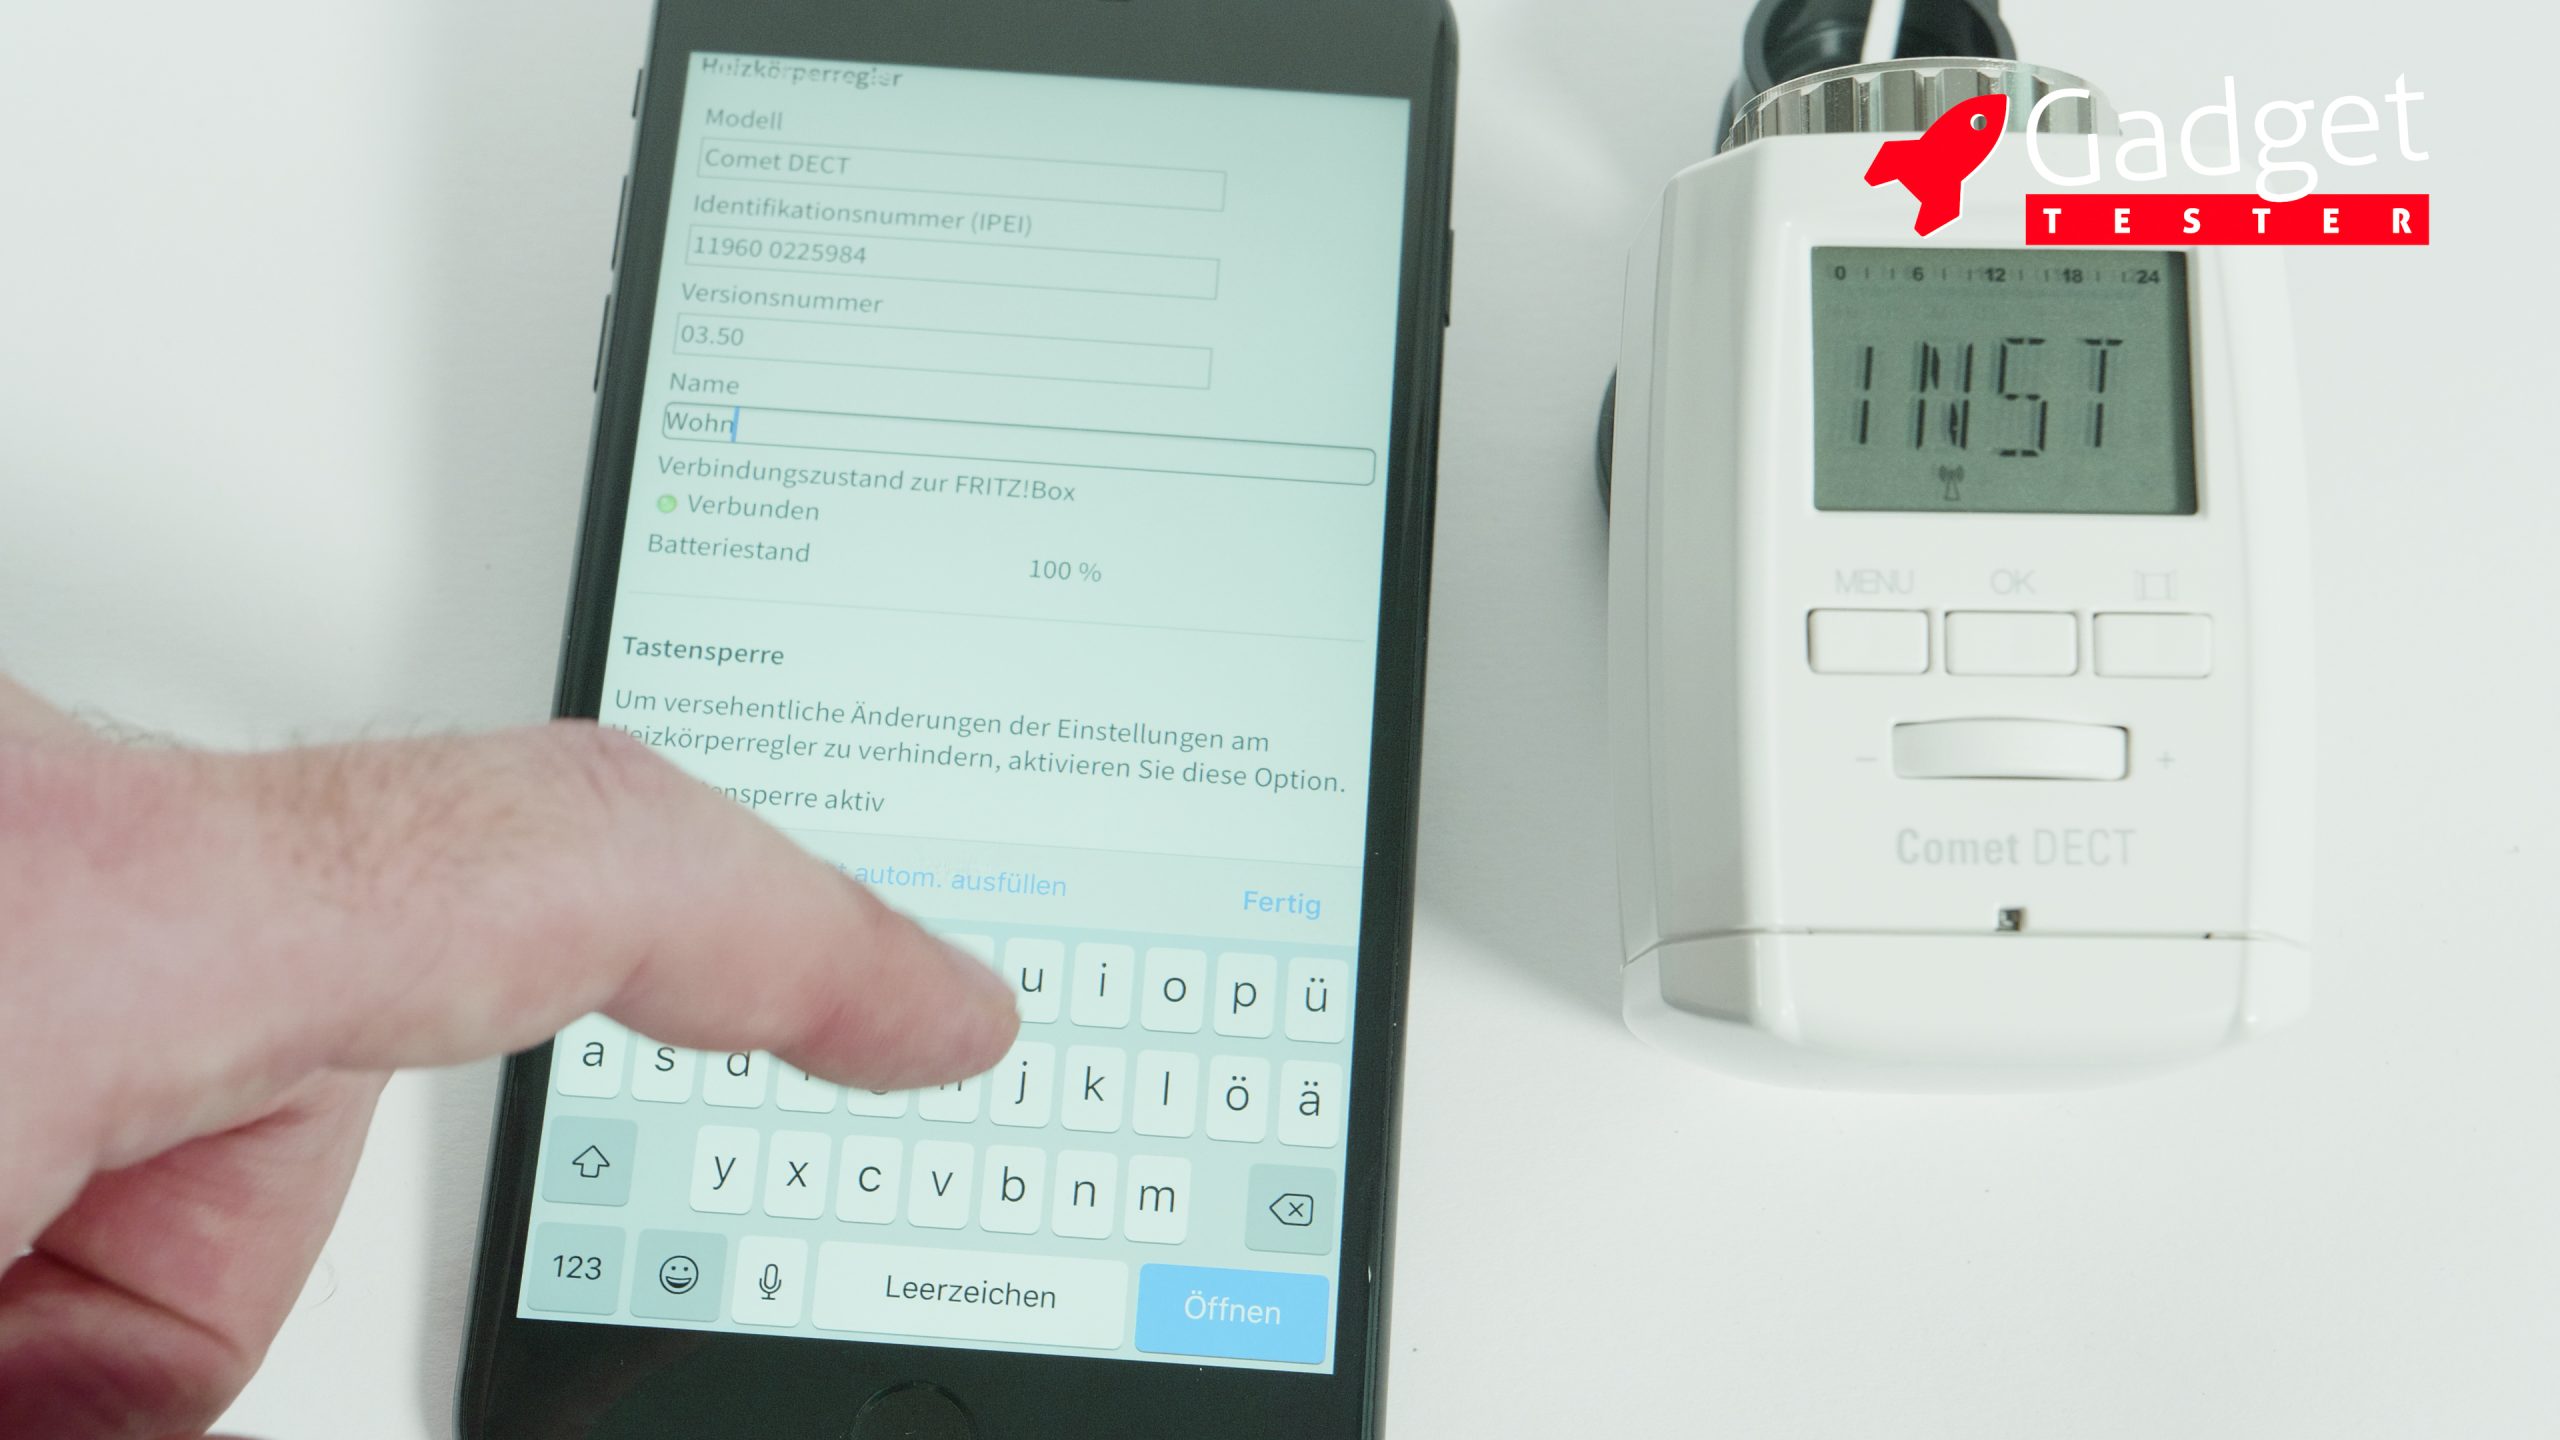
Register the Comet Dect via the Fritz!Box interface
Another option is to log in to the Fritz!Box interface (https://fritz.box) and click the “Register New Device” button under “Home Network” – “Smart Home”. While you will need a laptop, iPad, or iPhone for this, it offers several advantages: on the one hand, you can set up without having to leave the radiator each time, and the main features of the Comet Dect can be defined directly. Later, different devices can be easily identified by their names.
2. Attach the Comet Dect to the radiator
To unscrew the old thermostat, turn the valve fully open and then loosen the metal ring. You can use a pipe wrench to assist with this. After that, screw the Comet Dect tightly by hand. Now, press the “OK” button for a few seconds. The display will now show “APAP” for adapter and calibrate the valve by fully opening and closing it multiple times. After that, the thermostat is ready for use and the display switches to operational mode.
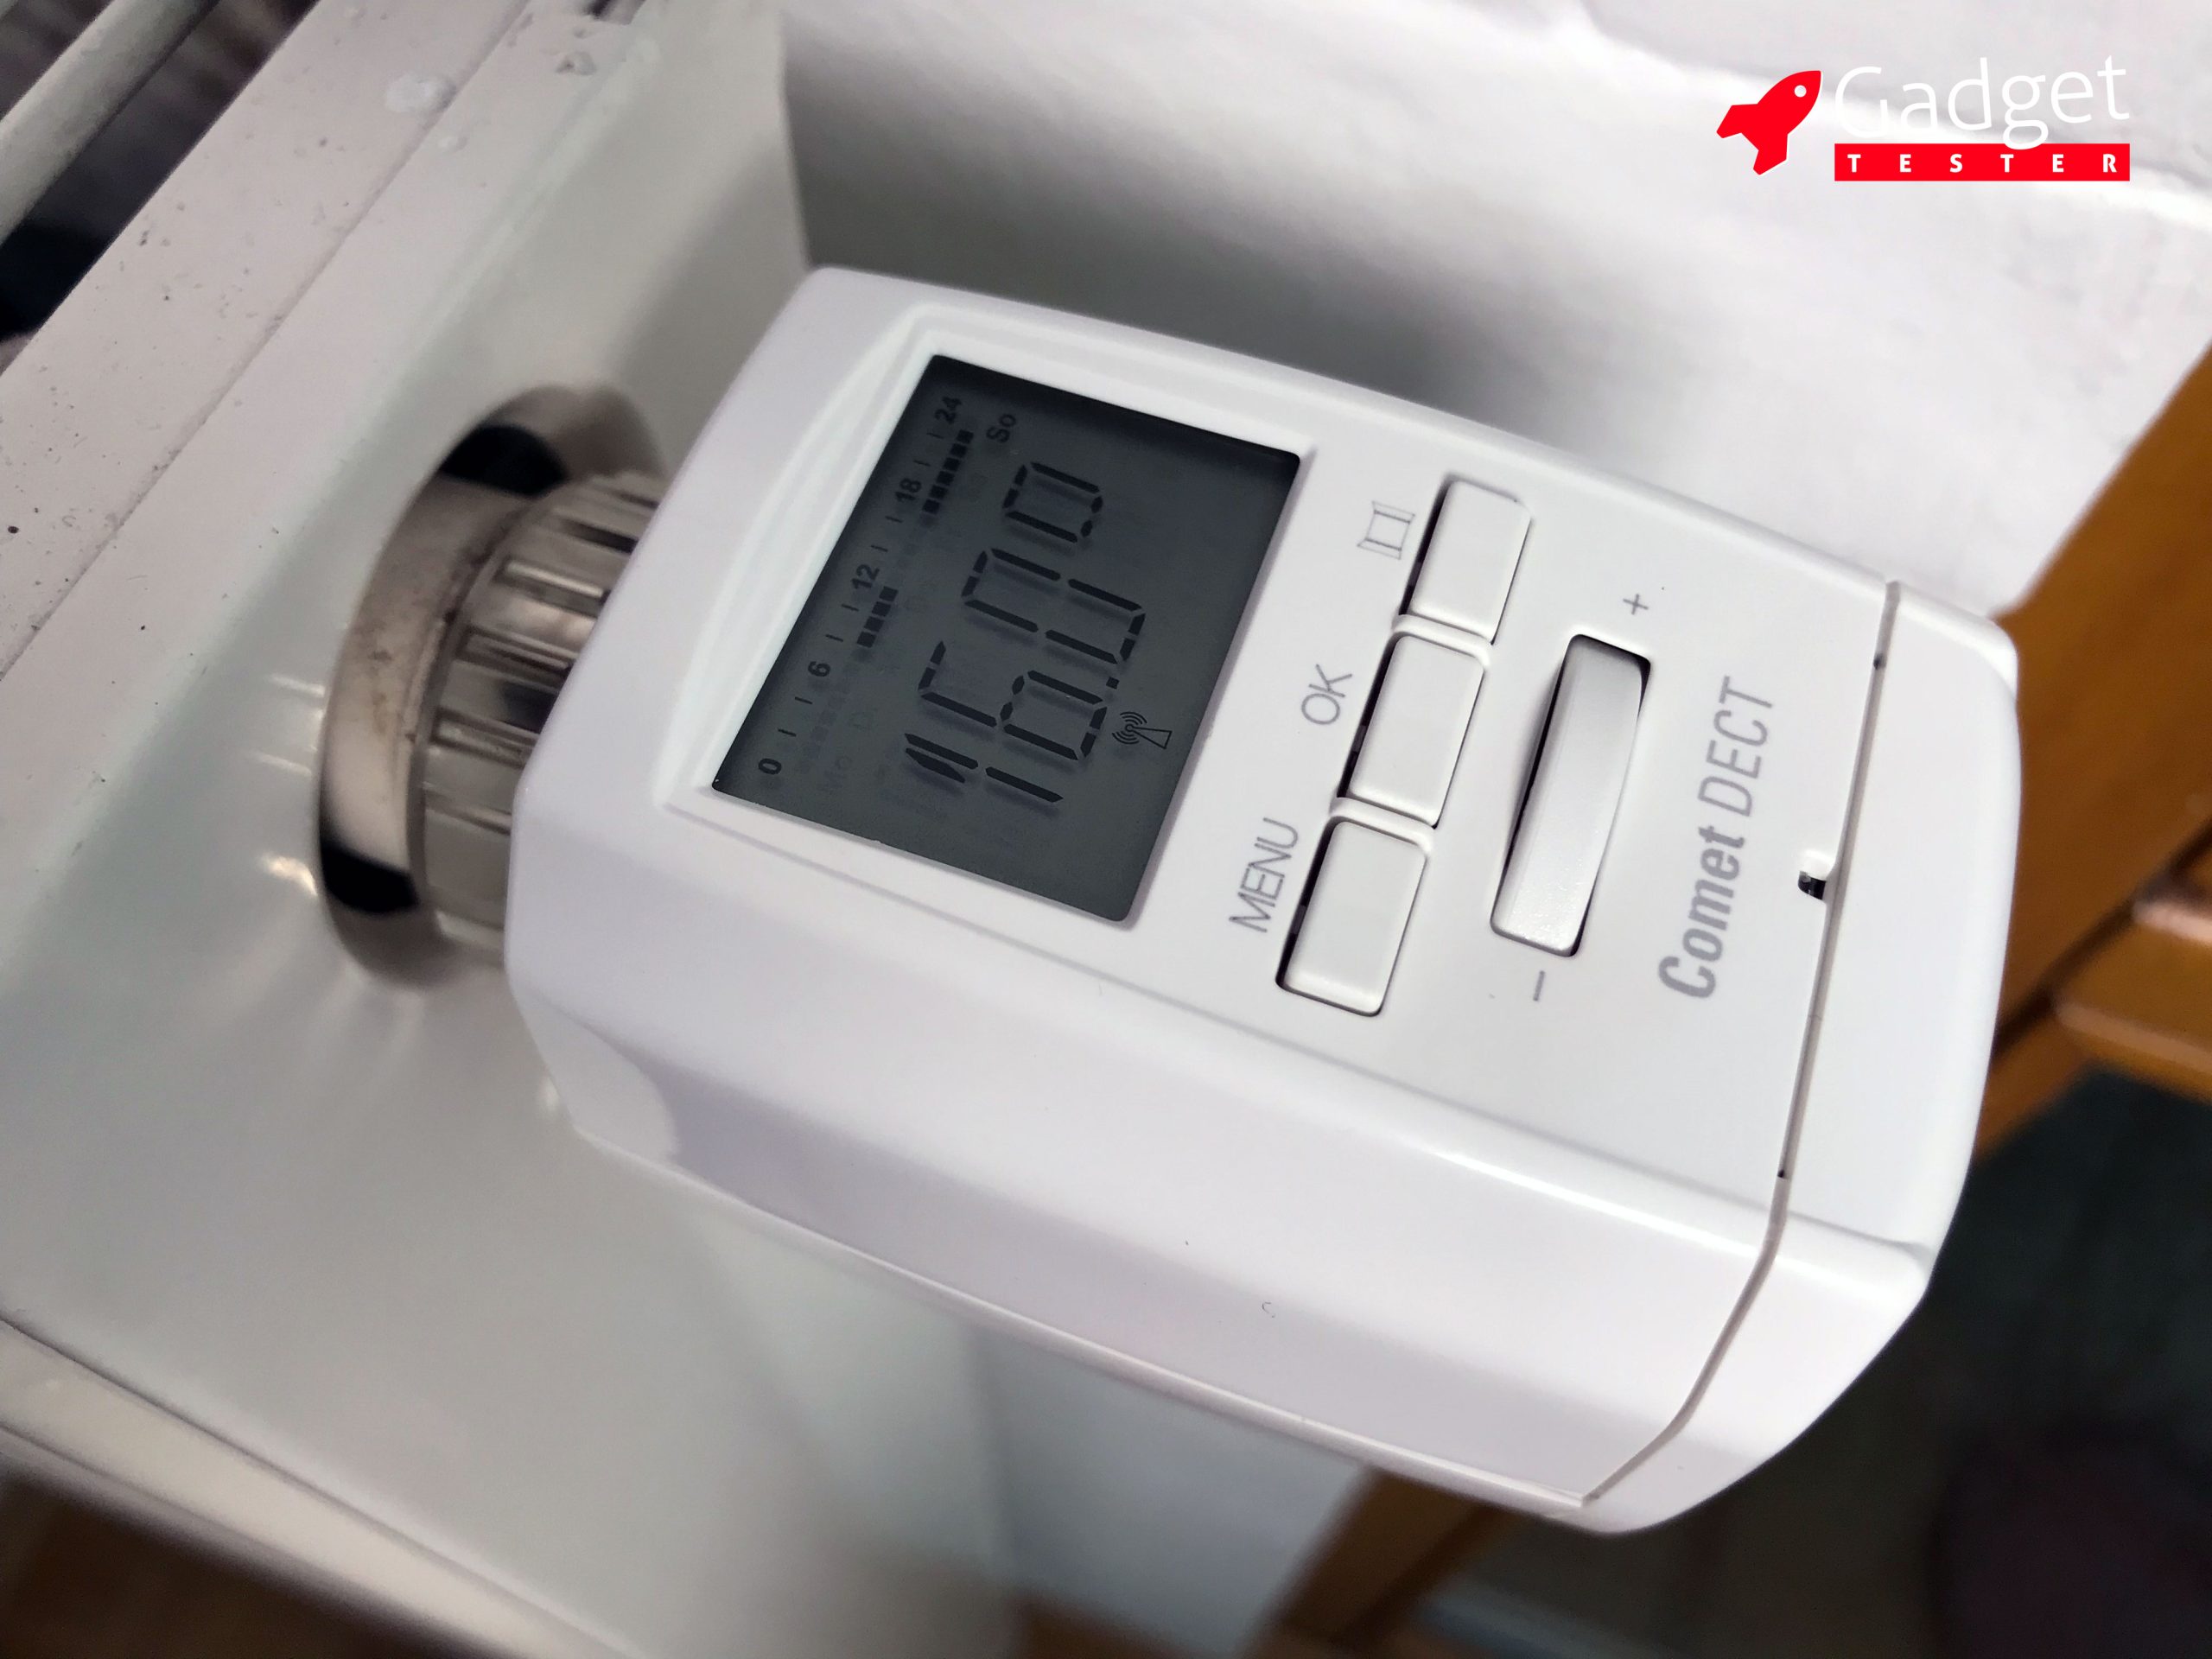
Operating the Comet Dect on the Device
The large number indicates the current temperature. In our case, the thermostat is set to 16 degrees. At the top, there is a timeline for the current day (Sunday) with the hours 0 – 24. The dark dots indicate the range during which the comfort temperature will be activated. Below, the DECT symbol is constantly lit. The display automatically turns off after a few seconds and can be reactivated by pressing one of the buttons or turning the adjustment dial.
The temperature can be adjusted at any time using the control knob.
The three buttons “Menu,” “OK,” and “Window for Detection” are only needed in exceptional cases.
3. Configure the Comet Dect via the Fritz!Box interface
To configure the thermostat in detail, we log in with a computer or an iPad on the Fritz!Box interface: https://fritz.box. On smartphones, only a limited range of settings is available.
Under “Home Network” – “Smart Home” we can see which devices are connected to the Fritz!Box.
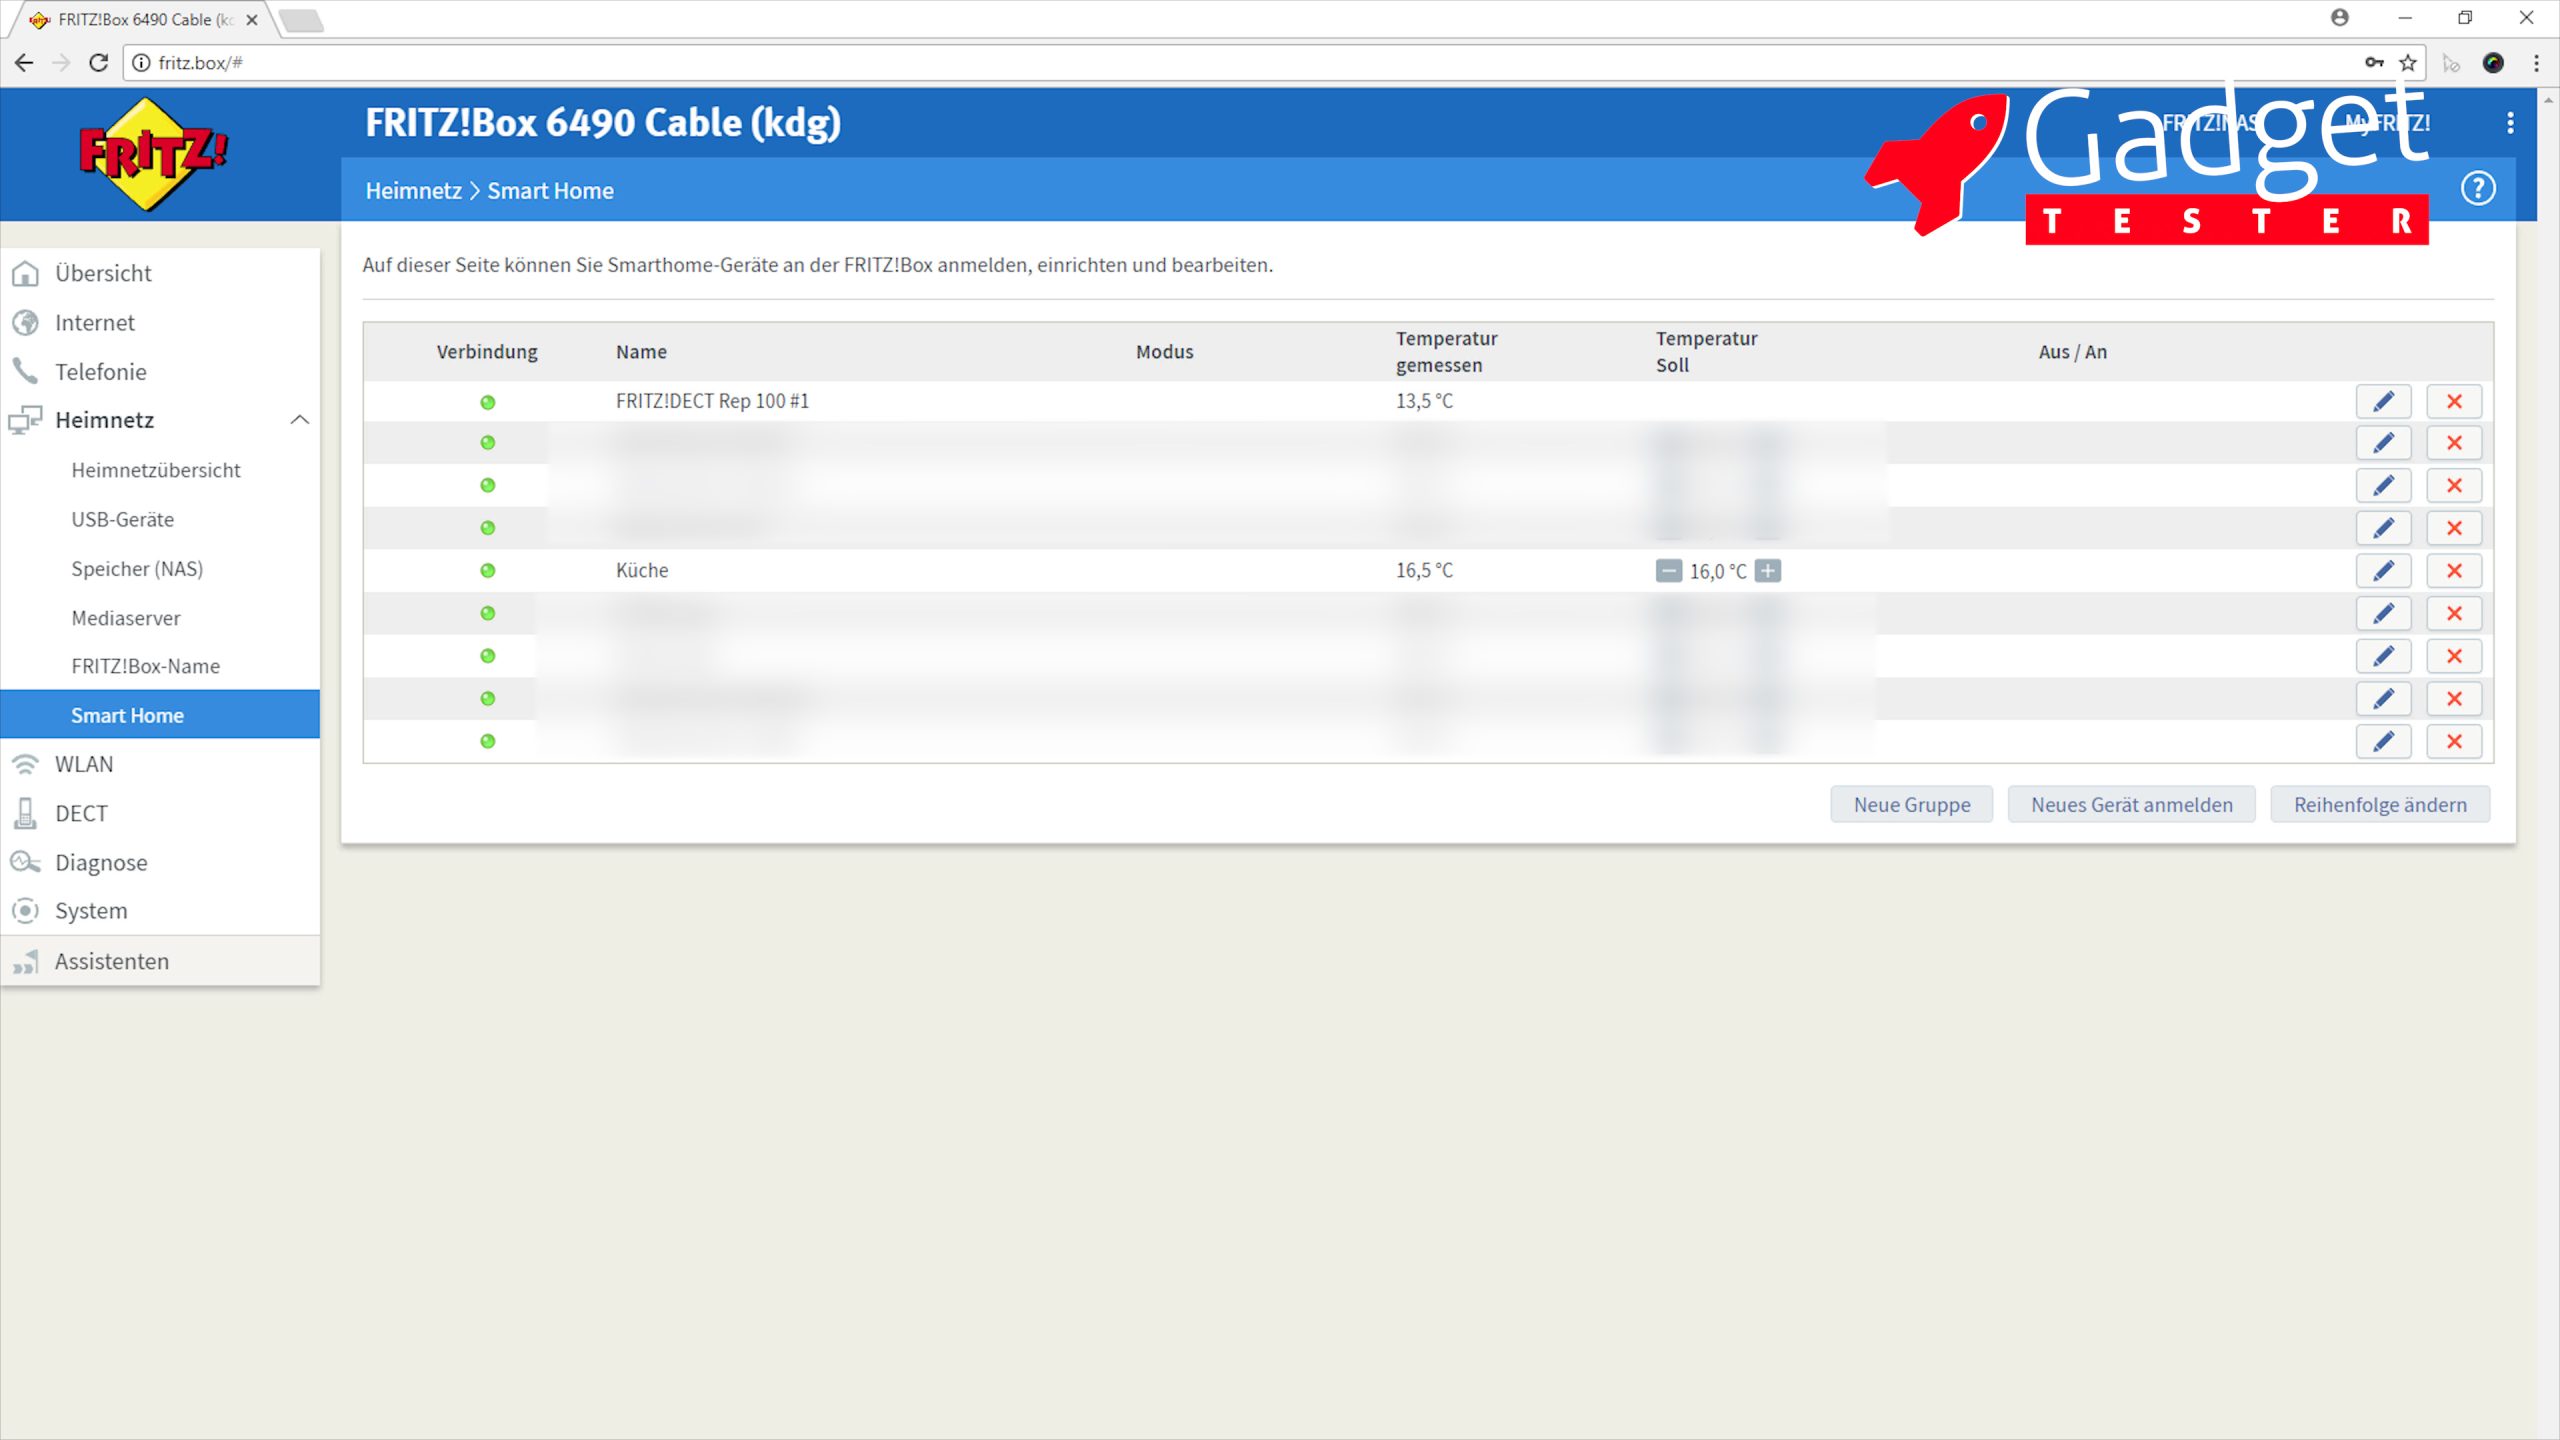
By clicking on the pencil next to the device, we can edit the settings.
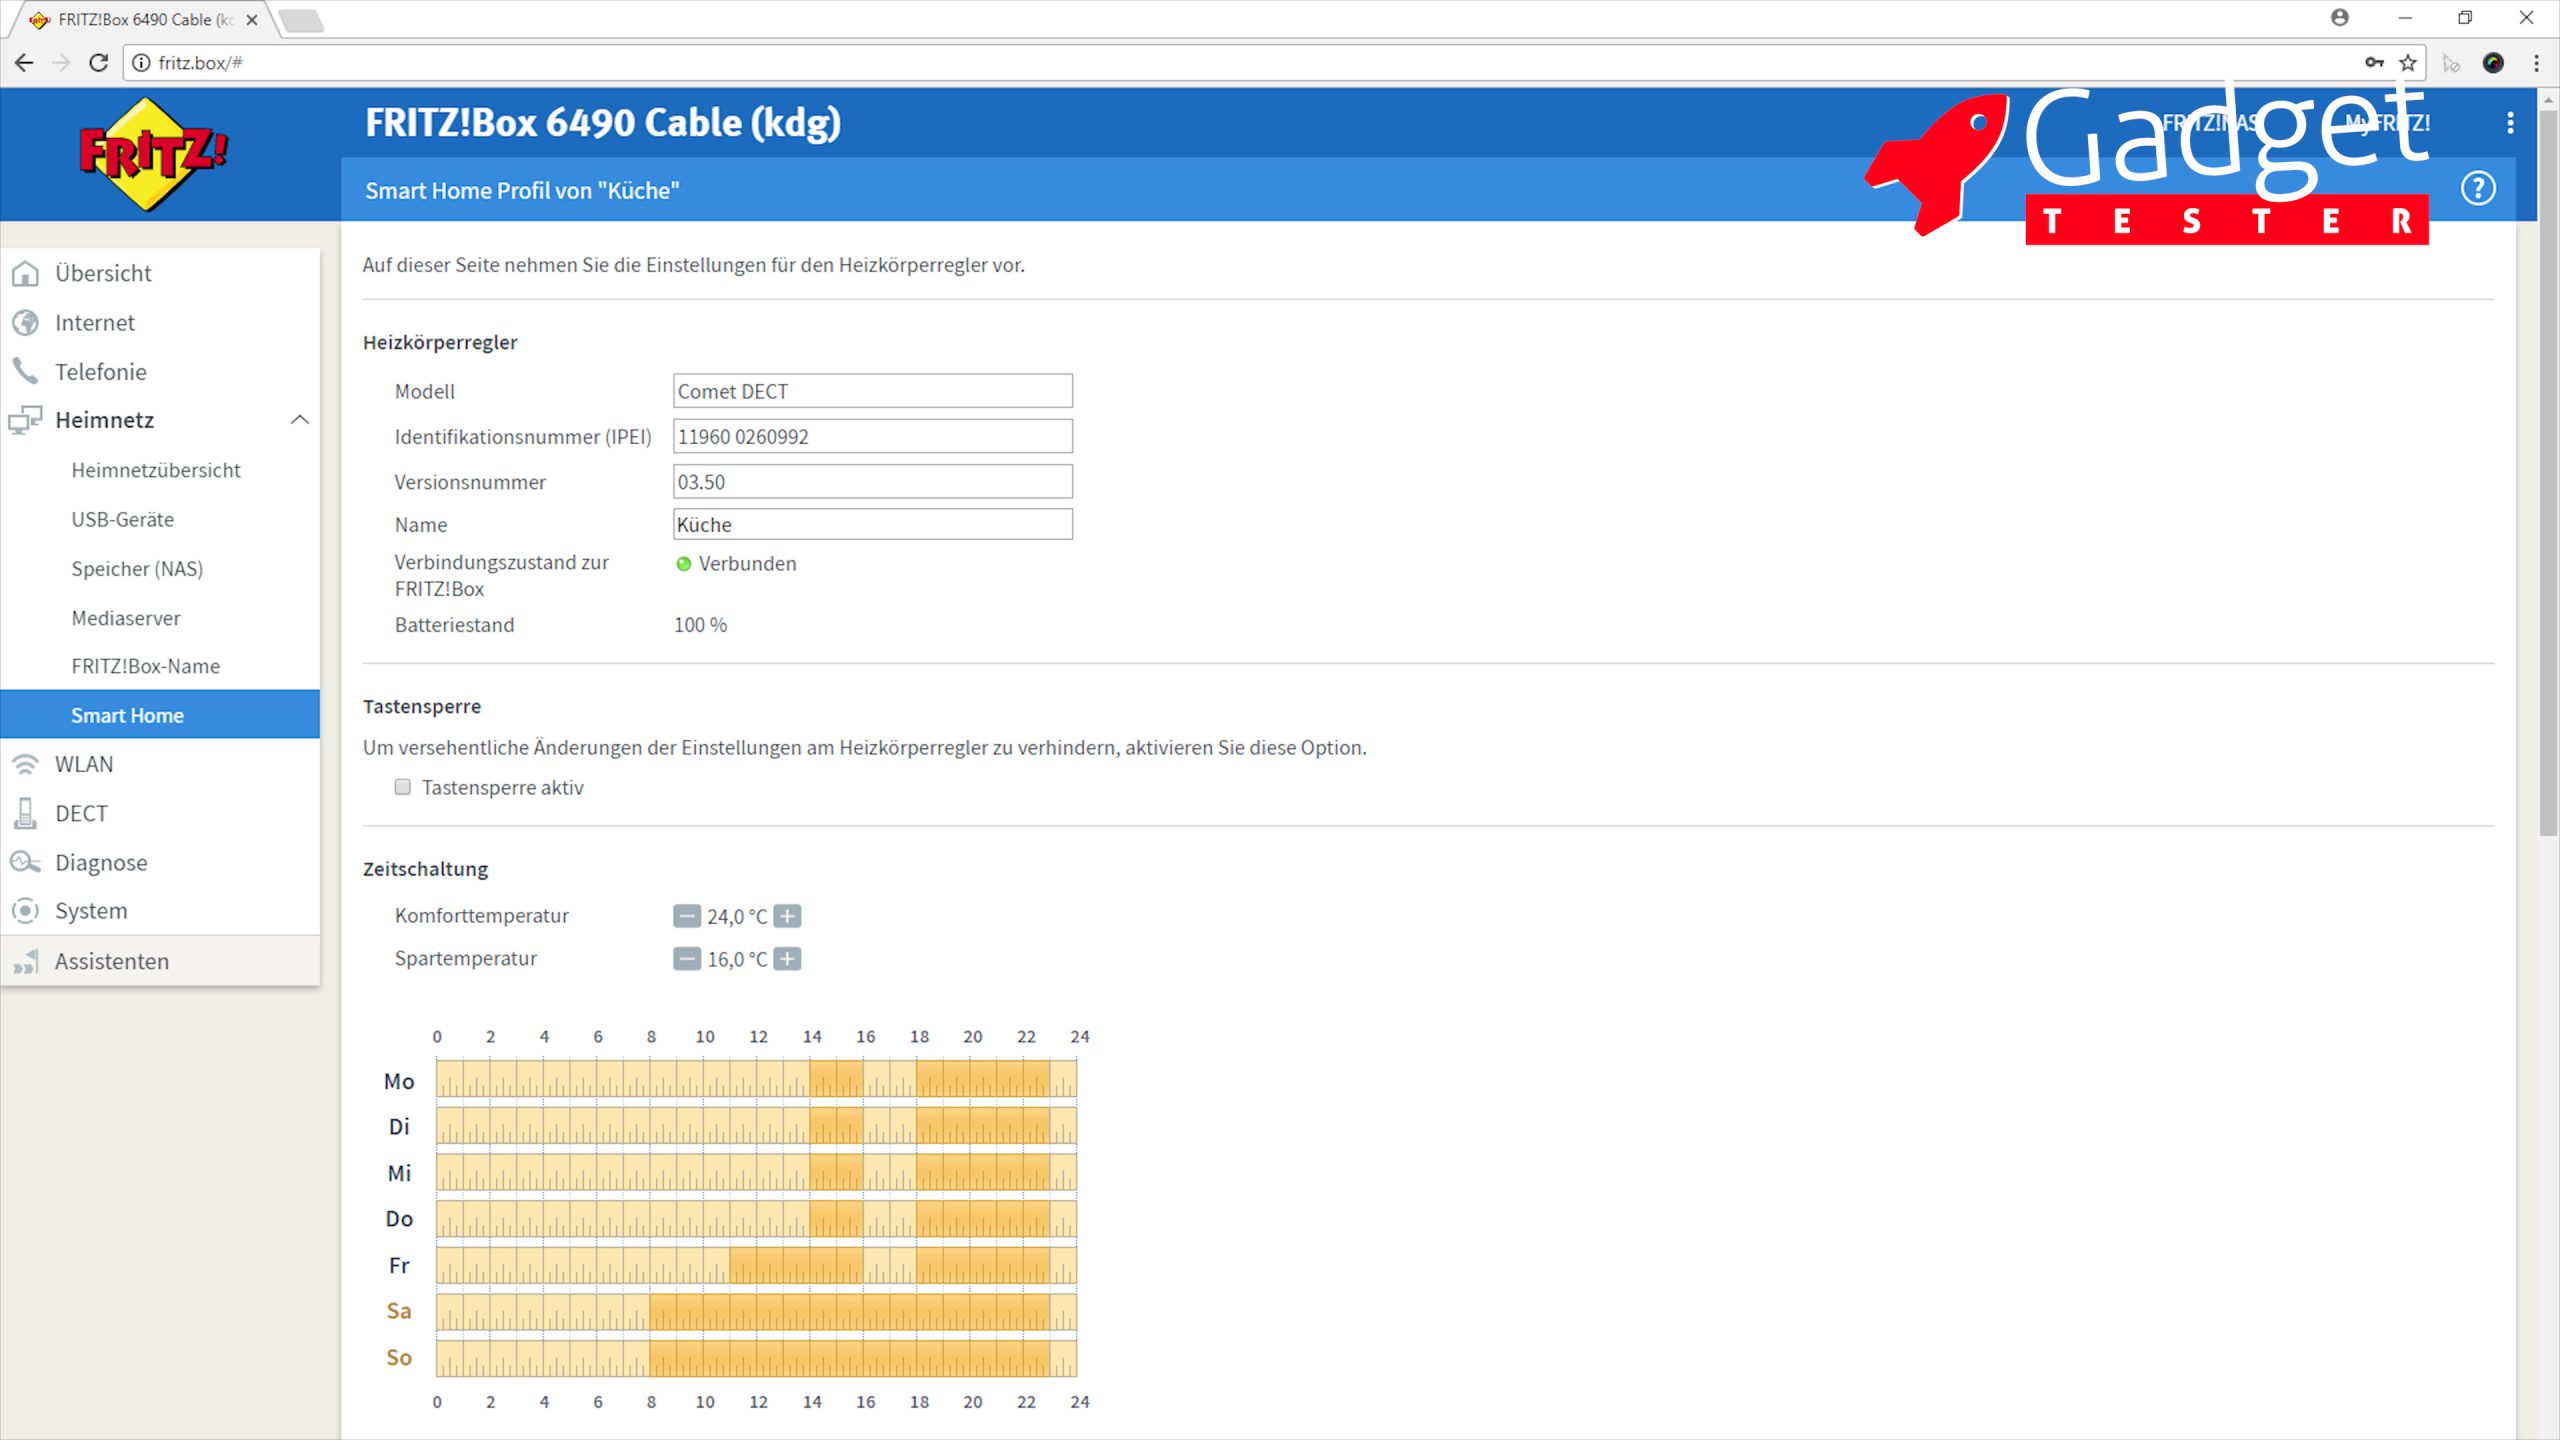
Now we can assign a name that allows the thermostat to be clearly identified, in case we haven’t done this during registration. This name will also enable us to control the thermostat later using Alexa.
When we activate the “key lock“, the thermostat can no longer be operated directly on the device.
The “time switch allows for the definition of a savings and a comfort temperature. Afterwards, you can use the mouse to define when the comfort temperature should be activated for the day of the week. At that exact time, the temperature will be raised. So, if you want a warm living room at 6:00 PM, you should activate the comfort temperature about 30 minutes earlier.
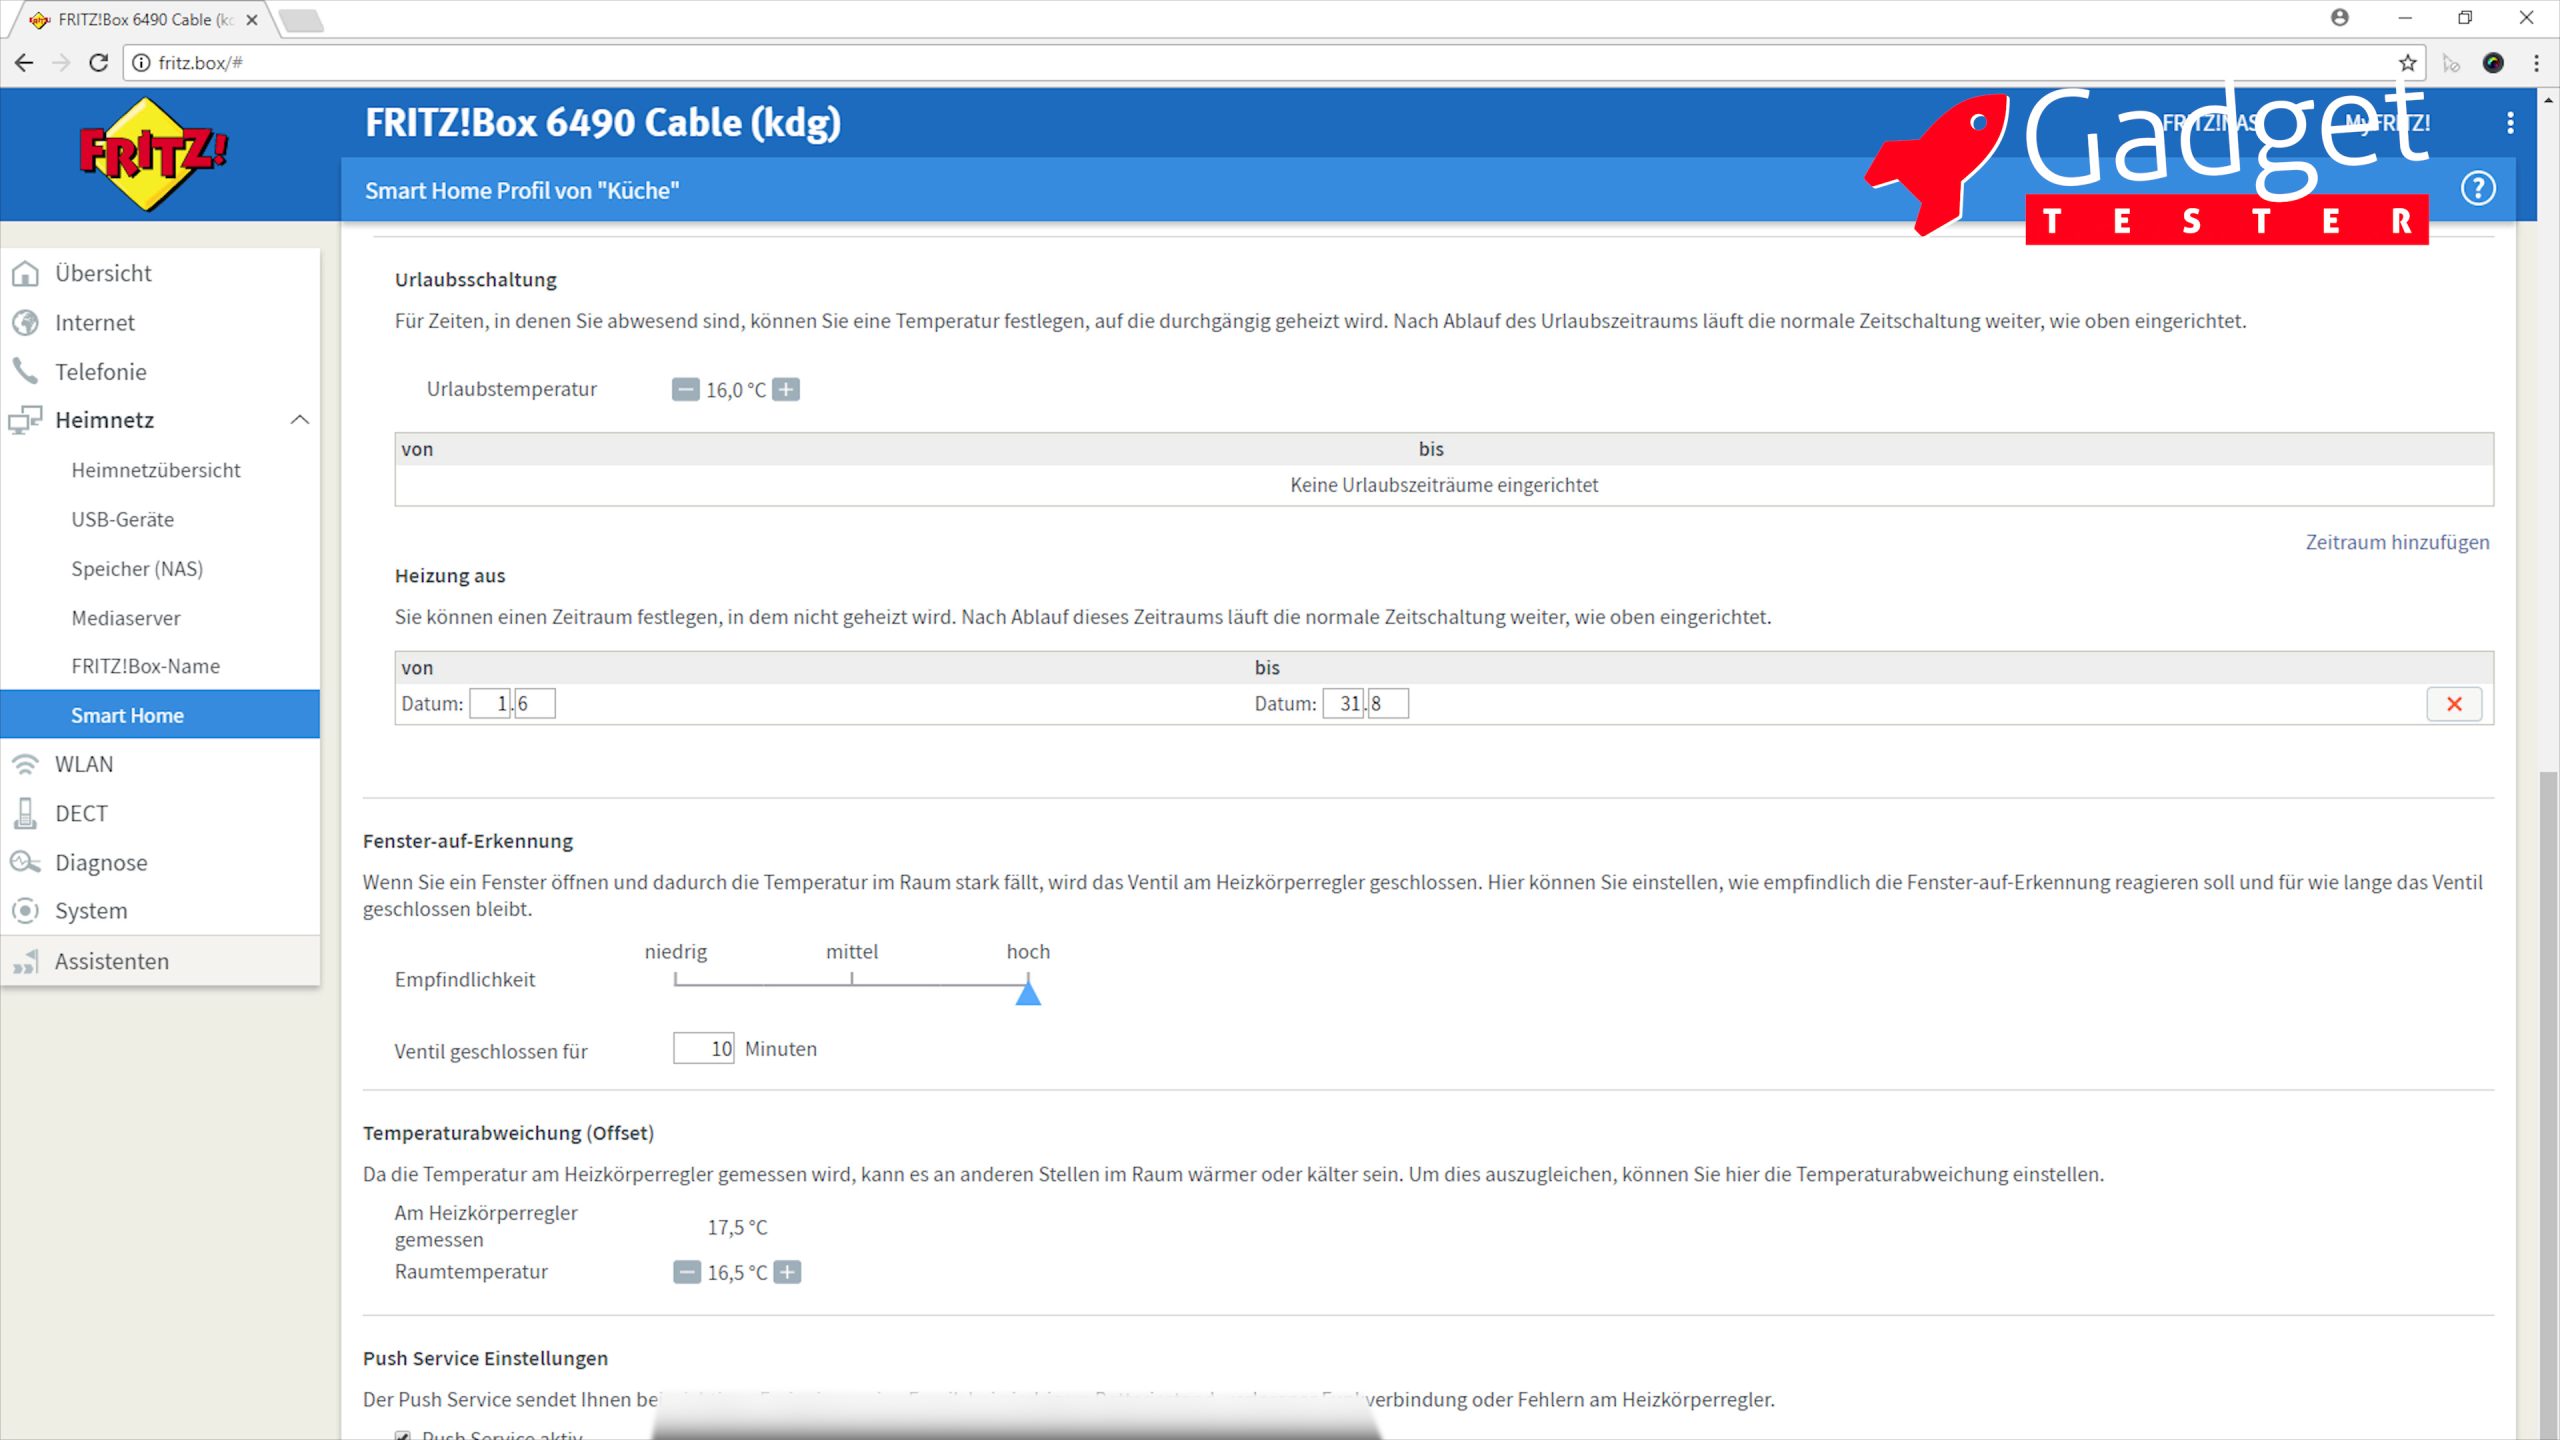
The “Vacation Mode” allows you to set a date range during which the heating should only reach a “vacation temperature.”
And with “Heating off”, you can set a date range during which the heating remains completely turned off.
The “window-open detection” performs very well in the standard settings and closes the valve for 10 minutes as soon as an open window is detected, which works flawlessly for us every time.
The “temperature deviation” allows you to determine the difference between the temperature measured at the radiator and the actual room temperature. This function is very useful, and after measuring the room temperature with a simple thermometer and adjusting the difference, we achieved a significantly more comfortable result.
Through the “Push Service Settings”, you can receive email notifications in case of a malfunction.
Conclusion:
We were convinced by the Eurotronic Comet Dect. The constant temperature in the rooms has noticeably improved the indoor climate. Additionally, the time control allows for significant cost savings in the long run. In our case, gas consumption has decreased by 30% in the first year!
The installation and setup can be carried out quickly and easily. Configuring through the Fritz!Box is straightforward. Integration with Amazon’s Alexa is also possible.
Additionally, by using the Fritz!Box as a central control unit, you are not dependent on a third-party manufacturer’s server.
The Comet Dect is priced between simpler Bluetooth thermostats and the AVM Dect thermostats AVM Fritz!DECT 301.
Unfortunately, multiple Comet Dect devices cannot be grouped together, which unnecessarily complicates their use. However, once you have found the perfect time intervals for your daily routine, you will rarely need to adjust the settings.
Heating Cost Savings
Thanks to the Comet Dect, our gas consumption has decreased by 30% in the first year! This investment has definitely paid off for us. Of course, the savings depend on several factors and may not always be this high.
Update from 32.01.2019: The group function has now been added through an update of the Fritz!Box.
In the two months since installation, we have experienced connection drops three times, which we were informed about via email. Once, it was necessary to remove and reinsert the batteries from a device to resolve this issue. On the other occasions, the error fixed itself.
Buy Eurotronic Comet Dect on Amazon:
https://amzn.to/2kjhHLa
Buy Fritz!Dect Repeater 100 to boost the DECT signal on Amazon: https://amzn.to/2AtMCPZ
Update from January 23, 2019:
After a year of using 8 Comet Dect thermostats, our gas costs have been reduced by 30%!
The group function has now been added through an update of the Fritz!Box.
Update from December 10, 2024:
As the availability of the Comet Dect has become significantly limited, we are now using the Fritz! Dect 302. The slightly higher purchase price is justified by the high-quality craftsmanship of the AVM thermostat. A video will follow soon!
Shopping Links
On this page, you will occasionally find links to products on Amazon. If you make a purchase through one of these links, I will receive a small commission – the price remains unchanged for you.
By making a purchase, you support my blog and help me continue creating exciting content and reviews for you. Thank you for your support!
Optimum
This is what I would buy today if I had to make the decision again:
Price: between 49 and 69 Euros
Budget
Occasionally, the Comet Dect is still available on Amazon.
Beware: The Comet Plus is the Wi-Fi variant!
Price: approx. 50 euros
Accessories
Useful accessories: